
Prefer to watch? Follow along with the video guide on YouTube.
Today, we are recreating the look and feel of a $39,000 short-film production without spending anything close to a professional production budget.
AI video generation has made cinematic filmmaking more accessible, but it can still become expensive quickly. Unnecessary generations, weak prompts, inconsistent scenes, and an inefficient workflow can burn through credits before you have enough usable footage to finish a film.
The good news is that you do not need an unlimited budget. The film above was built with a focused production kit, short controllable generations, and a traditional edit. Whether you are a filmmaker, content creator, video editor, or complete beginner, you can adapt the same workflow to your own story in Yapper.
The process has four parts:
- Build consistent character references.
- Create cinematic location references.
- Generate the story as a sequence of short clips.
- Edit the best moments into one finished film.


Part 1: Create Character Element Sheets
Before generating any scene, create an element sheet for every recurring character. This is one of the most important steps in the AI filmmaking process, so do not skip it.
You can ask Yapper Assistant to design a character and then create a reference sheet containing:
- A full-body front view
- A full-body side view
- A full-body back view
- A medium close-up of the face
These perspectives give the video model enough visual information to understand the character's clothing, proportions, silhouette, and facial features. That makes it much easier to maintain the same identity from one shot to the next.
Keep Only One Face on the Sheet
It may seem helpful to show the character's face in every view, but several faces on the same sheet can sometimes compete with one another. A cleaner approach is to crop the front, side, and back views at the neck and keep one unobstructed close-up as the identity reference.
Prompt: Create a Photorealistic Character Element Sheet
For this film, the same hero needed different wardrobe anchors for the pirate, desert, and jungle sections. Supporting characters and the larger pirate crew received their own references too.
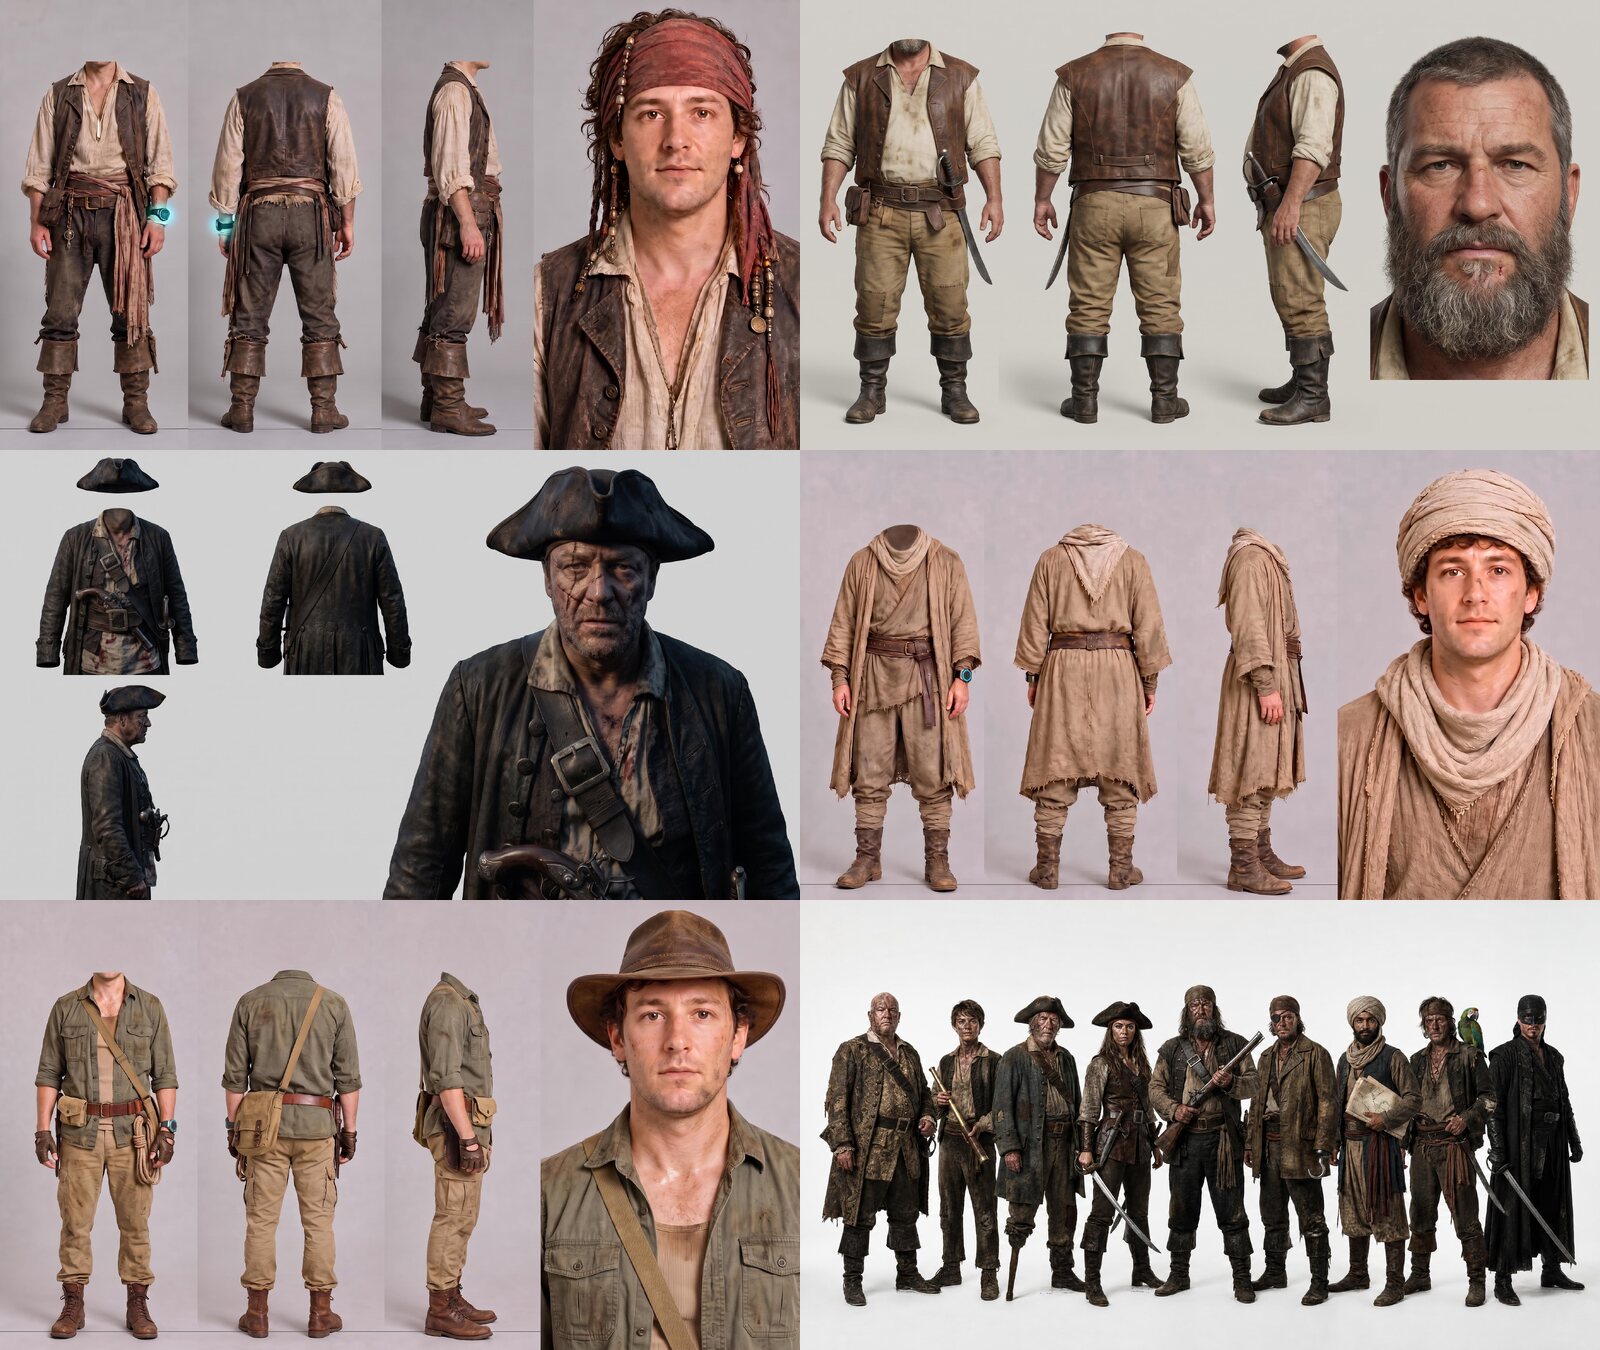
Generate several versions before locking a character. It is cheaper to solve the face, wardrobe, and proportions at the image stage than to discover those problems after generating video.
Part 2: Generate Location References
Once the character sheets are complete, build the locations for the film. This story moves through three worlds: a pirate ship, a desert, and a jungle.
Your video will only be as convincing as the references you provide. If a location image looks flat, illustrated, or poorly lit, the generated clip will usually inherit those problems. Create each environment as a wide establishing image with enough information for the model to infer new camera angles.
Pirate Captain's Cabin
Pirate Ship Deck
Open Desert
Dense Jungle
Jungle Cliff Path
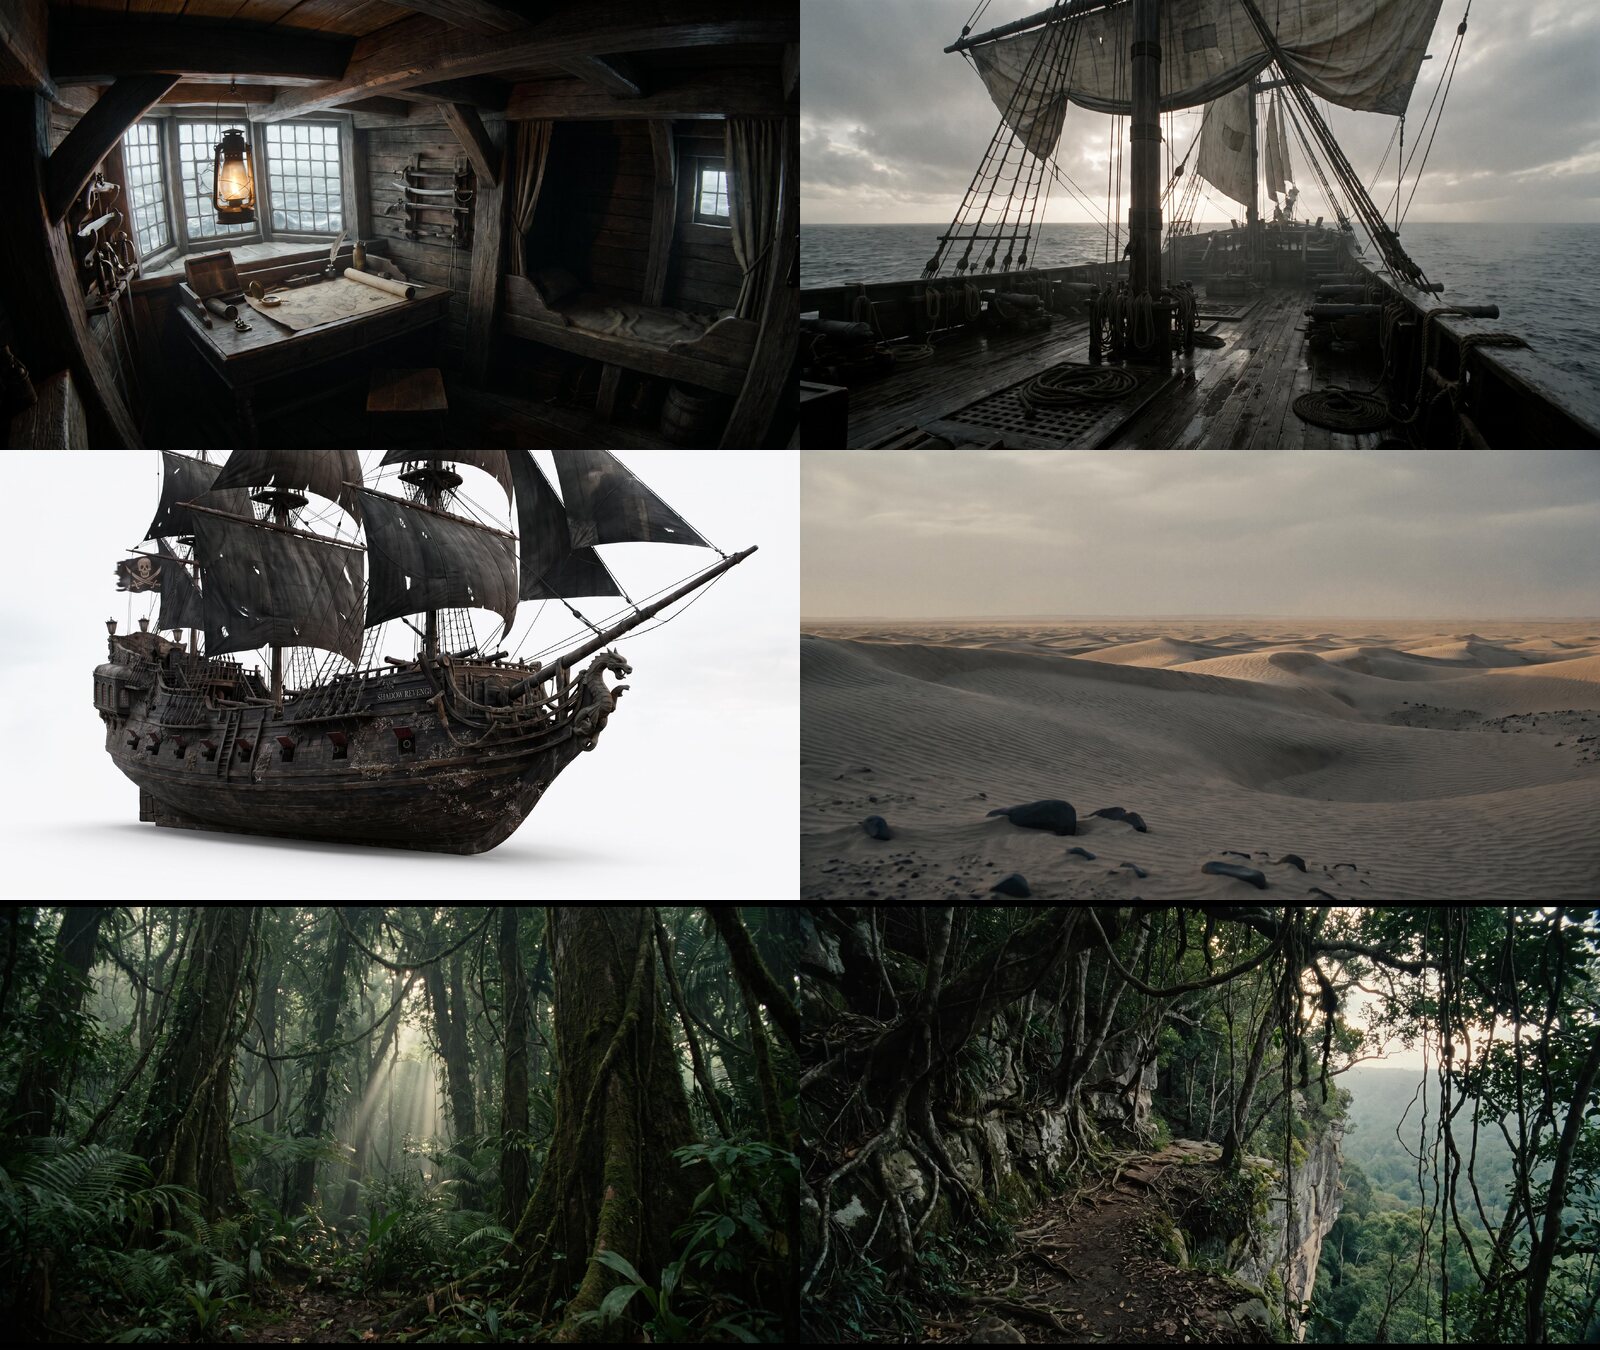
How to Prompt Realistic AI Locations
The most useful location prompts describe visible photographic choices rather than relying on a long list of quality words.
- Ask for photorealistic, cinematic, naturally textured imagery grounded in real-world lighting.
- Explicitly avoid cartoon, illustration, concept-art, and digital-painting treatments when realism matters.
- Motivate the light with sources that could exist in the scene: sunlight, windows, lanterns, streetlights, fire, headlights, or practical interior lights.
- Use a recognizable professional camera reference, such as an ARRI Alexa cinema look, to guide dynamic range, texture, and color response.
- Keep wide establishing references readable in the shadows. A dark location can still preserve important spatial information.
You do not need to overload every prompt with technical specifications. Give the model a clear subject, composition, lighting plan, texture, and camera language, then stop.
Part 3: Generate the Video Clips
Do not try to generate the entire film in one pass. Treat every generation as a short scene with an explicit cast, environment, camera plan, action, dialogue, sound, and list of failure modes to avoid.
The references below complete the production kit: the hero's ship, the ostrich-mounted bandits, the oversized jungle monkeys, and the watch used for the final effect.
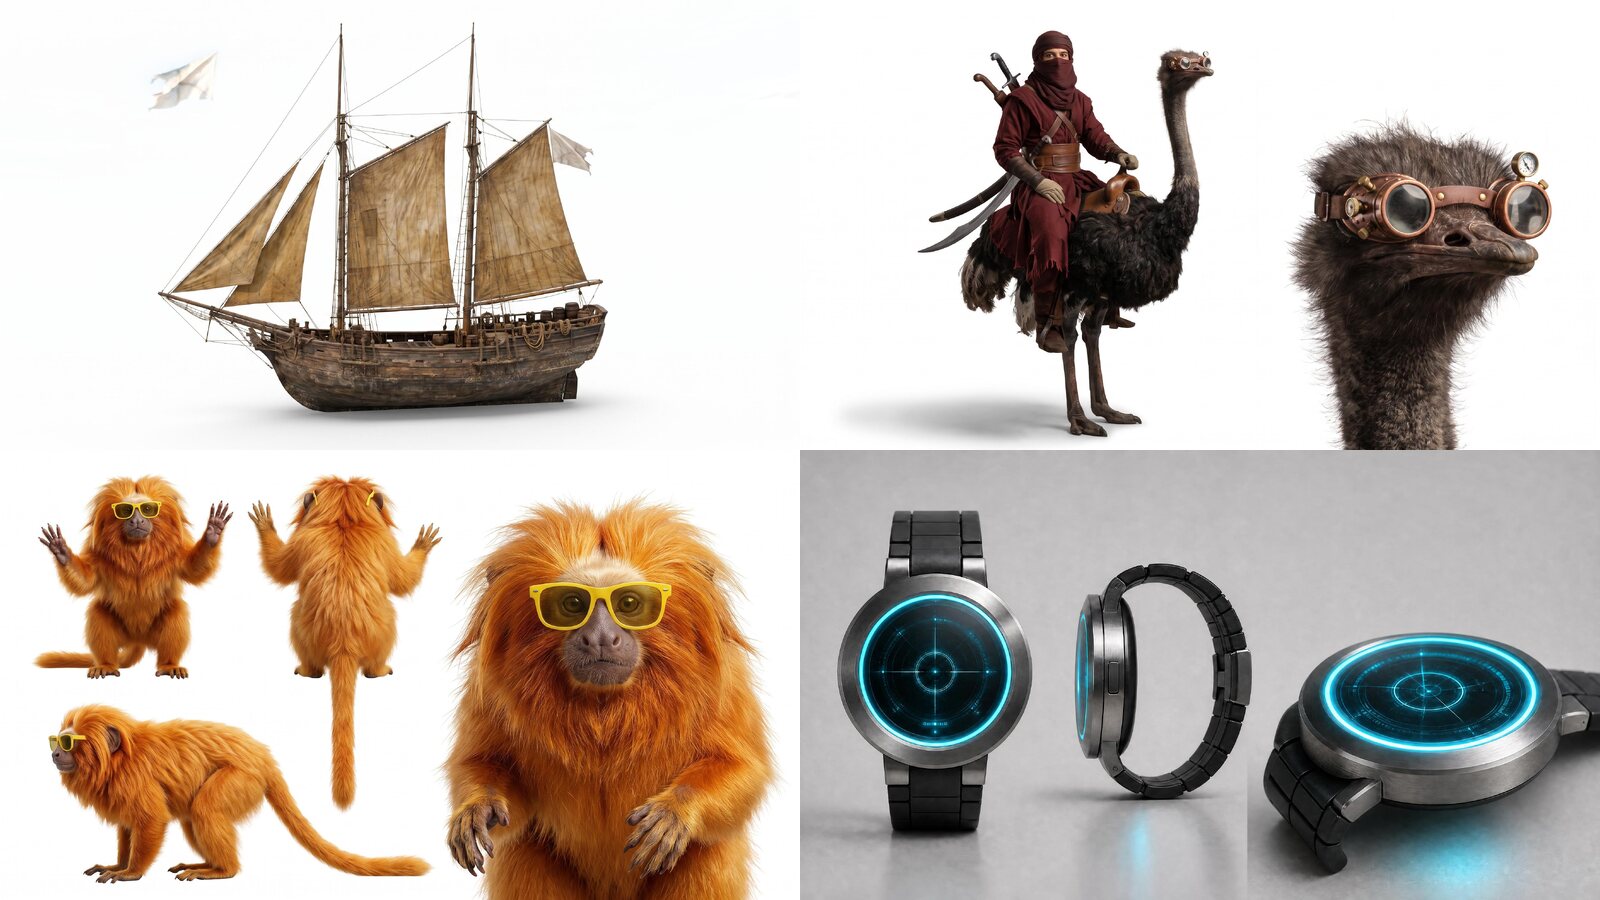
The prompts are templates. Replace the characters, props, and locations while preserving the structure, camera direction, lighting logic, movement, and timing.
Sequence 1: The Pirate Voyage
Scene 1: The Captain Finds the Island
Scene 2: Prepare for Battle
Scene 3: The Enemy Attacks
Scene 4: The Captain Goes Overboard
Sequence 2: The Desert Chase
Scene 5: A Hard Landing
Scene 6: Reveal the Bandits
Scene 7: Run
Sequence 3: The Jungle Escape
Use the dust blackout as a transition between locations. It lets the next clip open in a completely different environment without asking one generation to solve the entire transformation.
Scene 8: Wake Up Upside Down
Scene 9: The Monkey Chase
Scene 10: The Tiger and the Cliff
Scene 11: The Watch Escape
Generate more than one version of the most important scenes. A take with the best camera move may have a weak face, while another may have a perfect performance but an unusable ending. During the edit, you can combine the strongest fragments from both.
Part 4: Edit the Film
Bring every generated clip into your editing software and treat it as raw footage, not as a finished scene.
Build the Sequence From the Best Moments
Split each generation into individual shots, remove broken or inconsistent frames, and arrange the strongest moments around story, pacing, continuity, and emotion.
Alternate wides, medium shots, close-ups, and inserts. If an important beat is missing, generate only that insert instead of recreating the full scene. A reaction, prop close-up, impact, environmental cutaway, or transition can often solve the edit at a fraction of the cost.
The blackout created by the desert dust gives the film a clean transition into the jungle. The final falling hat gives the last scene a visual endpoint after the hero disappears. Planning those transition images inside the generation prompts makes the edit easier later.
Finish Sound After the Picture Works
Use the model's diegetic audio where it is clean, then rebuild weak or inconsistent moments with sound effects. Keep dialogue intelligible and use ambience to connect cuts recorded in different generations.
Once the picture edit is stable, ask Yapper Assistant to develop an original score that follows the film's changing locations and comic-adventure tone.
The full post-production loop is simple:
Generate, split, remove, rearrange, add missing inserts, rebuild sound, and polish.
Create Your Own AI Short Film
The same workflow works for adventure films, trailers, comedy sketches, product campaigns, music videos, historical stories, and short-form series.
Start with a simple story, solve consistency in pre-production, generate short controllable scenes, and treat every output as production material rather than a finished result.
Use Yapper Assistant to develop the script and reference kit, then turn each scene into a controllable AI video clip.